November 25, 2019. Written by Claire Harr.
Are you designing a business card for yourself, a client, or a colleague? Do you want to display your design in a professional looking mockup without having to pay for a mockup template? This tutorial will show you how to make a business card mockup in Photoshop in 5 easy steps.
Mockups are the best way to see what your business cards will look like when they are printed. If you are designing business cards for someone else, mockups are also the most effective way to present your design ideas to that person to get their opinion or approval.
A gradient background is better than a single color background because a gradient of two colors creates a more interesting and dynamic backdrop. Grey gradients are recommended as they allow all colors in your business card design to look great.
Follow these five easy steps to make a business card mockup in Photoshop:
1. Set up the Photoshop document
2. Place (import) your business card designs
3. Add a gradient background
4. Add drop shadows
5. Export the finished business card mockup
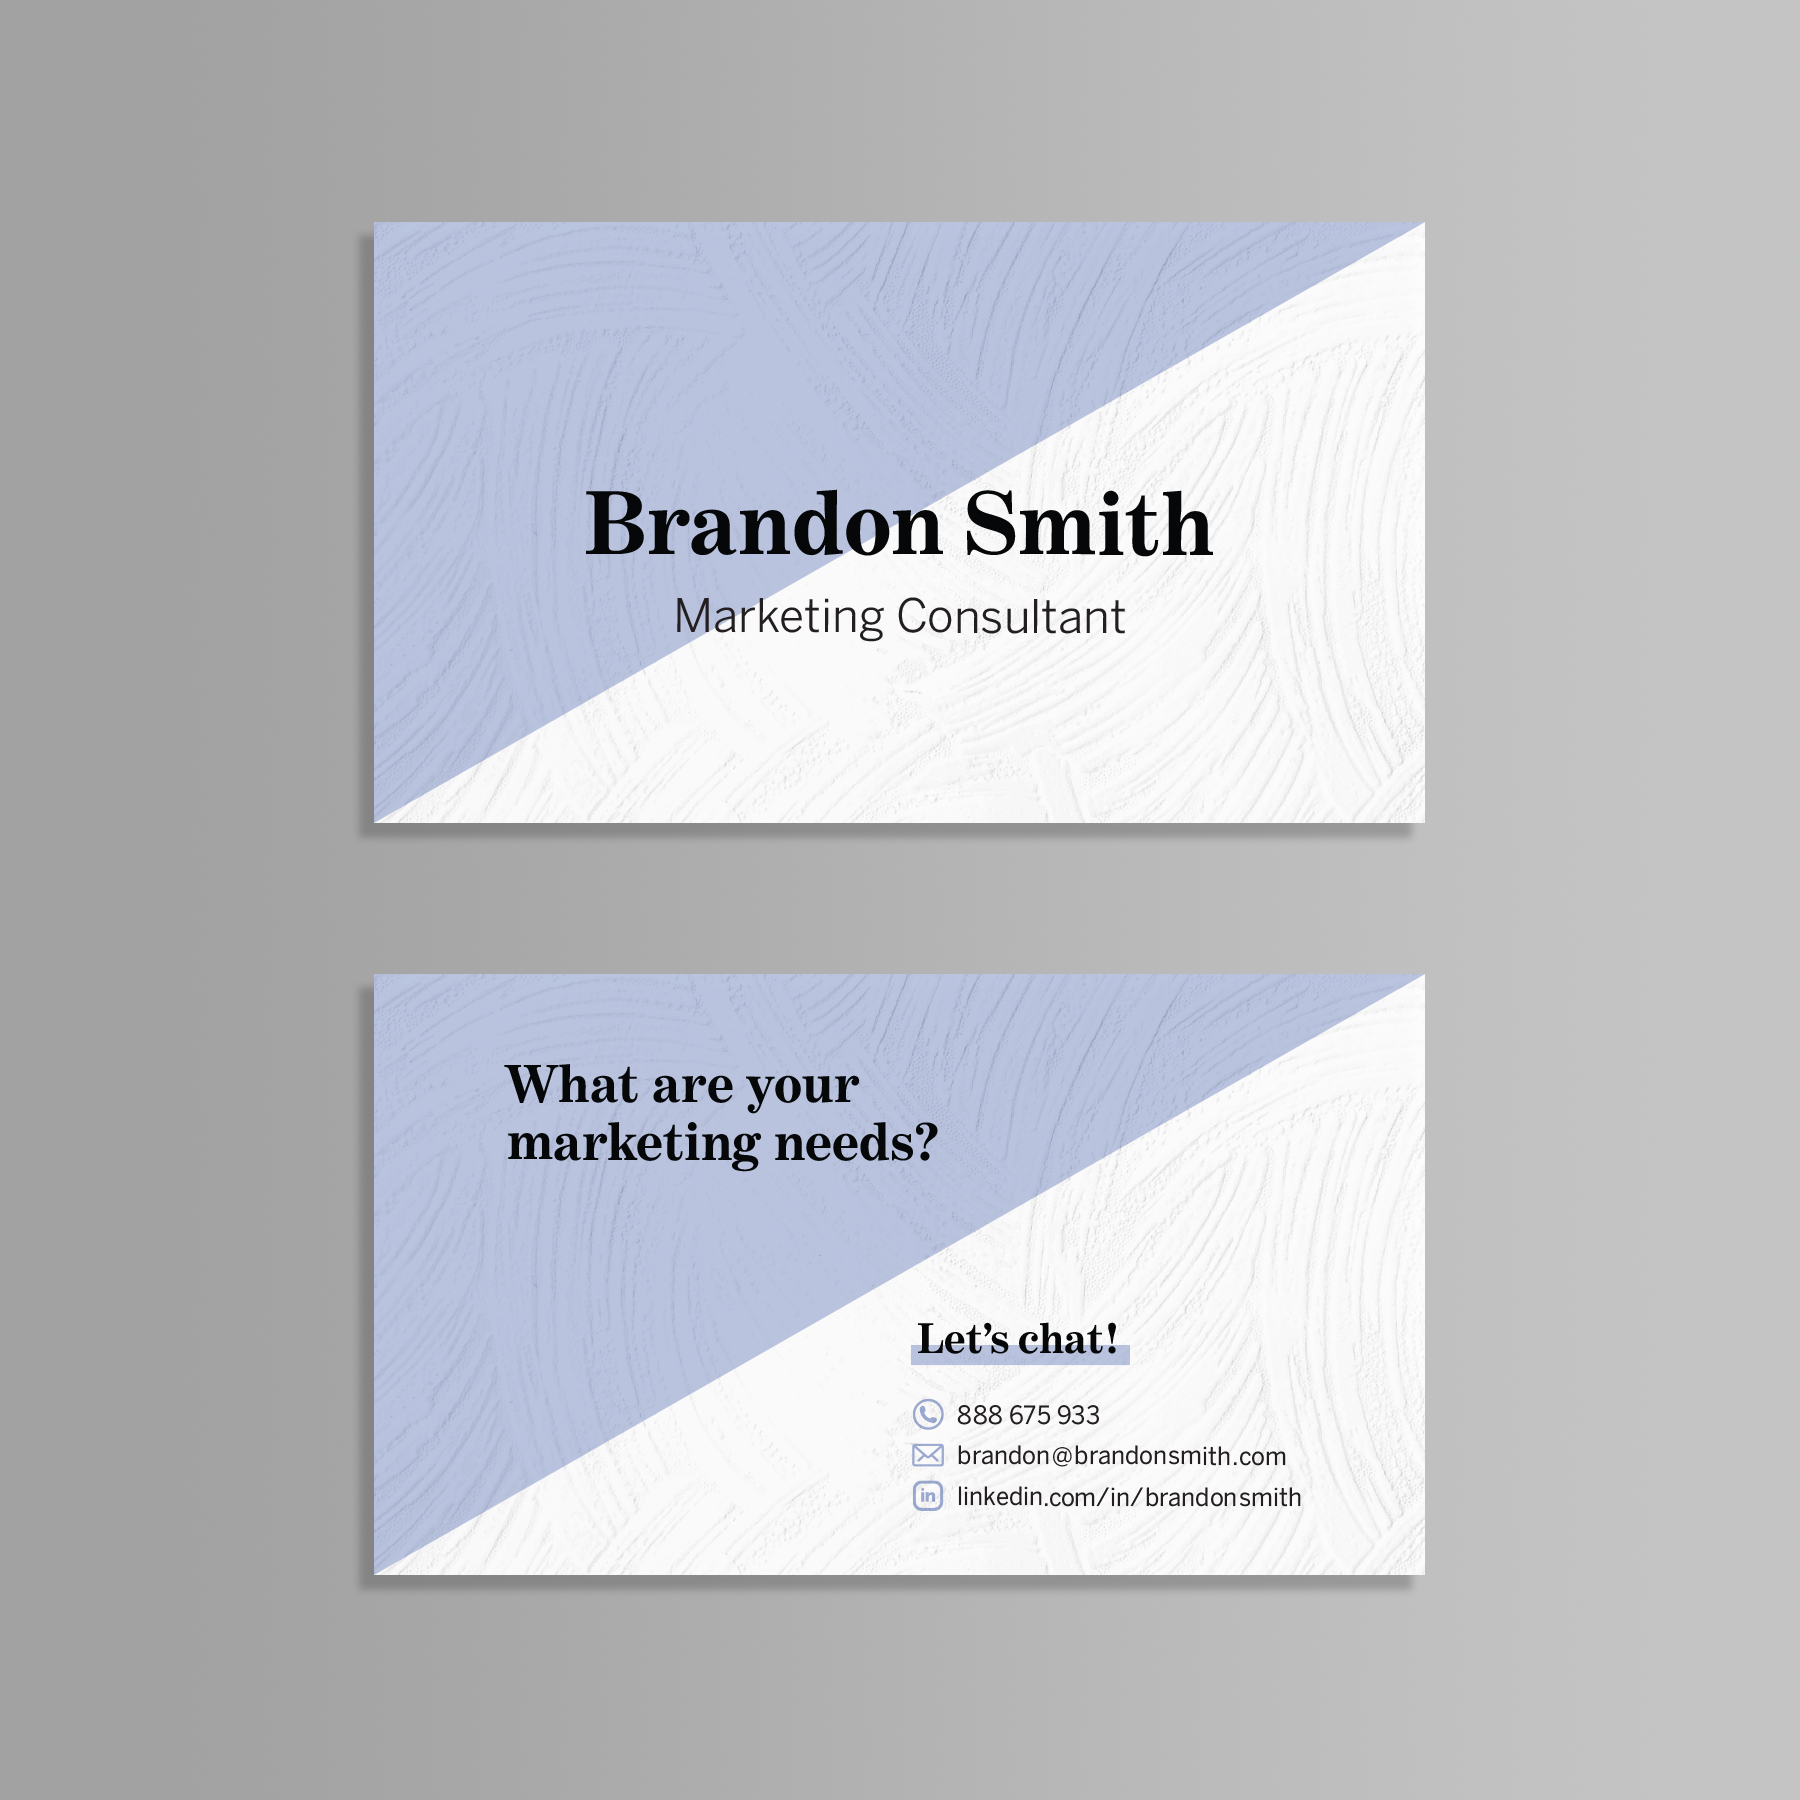
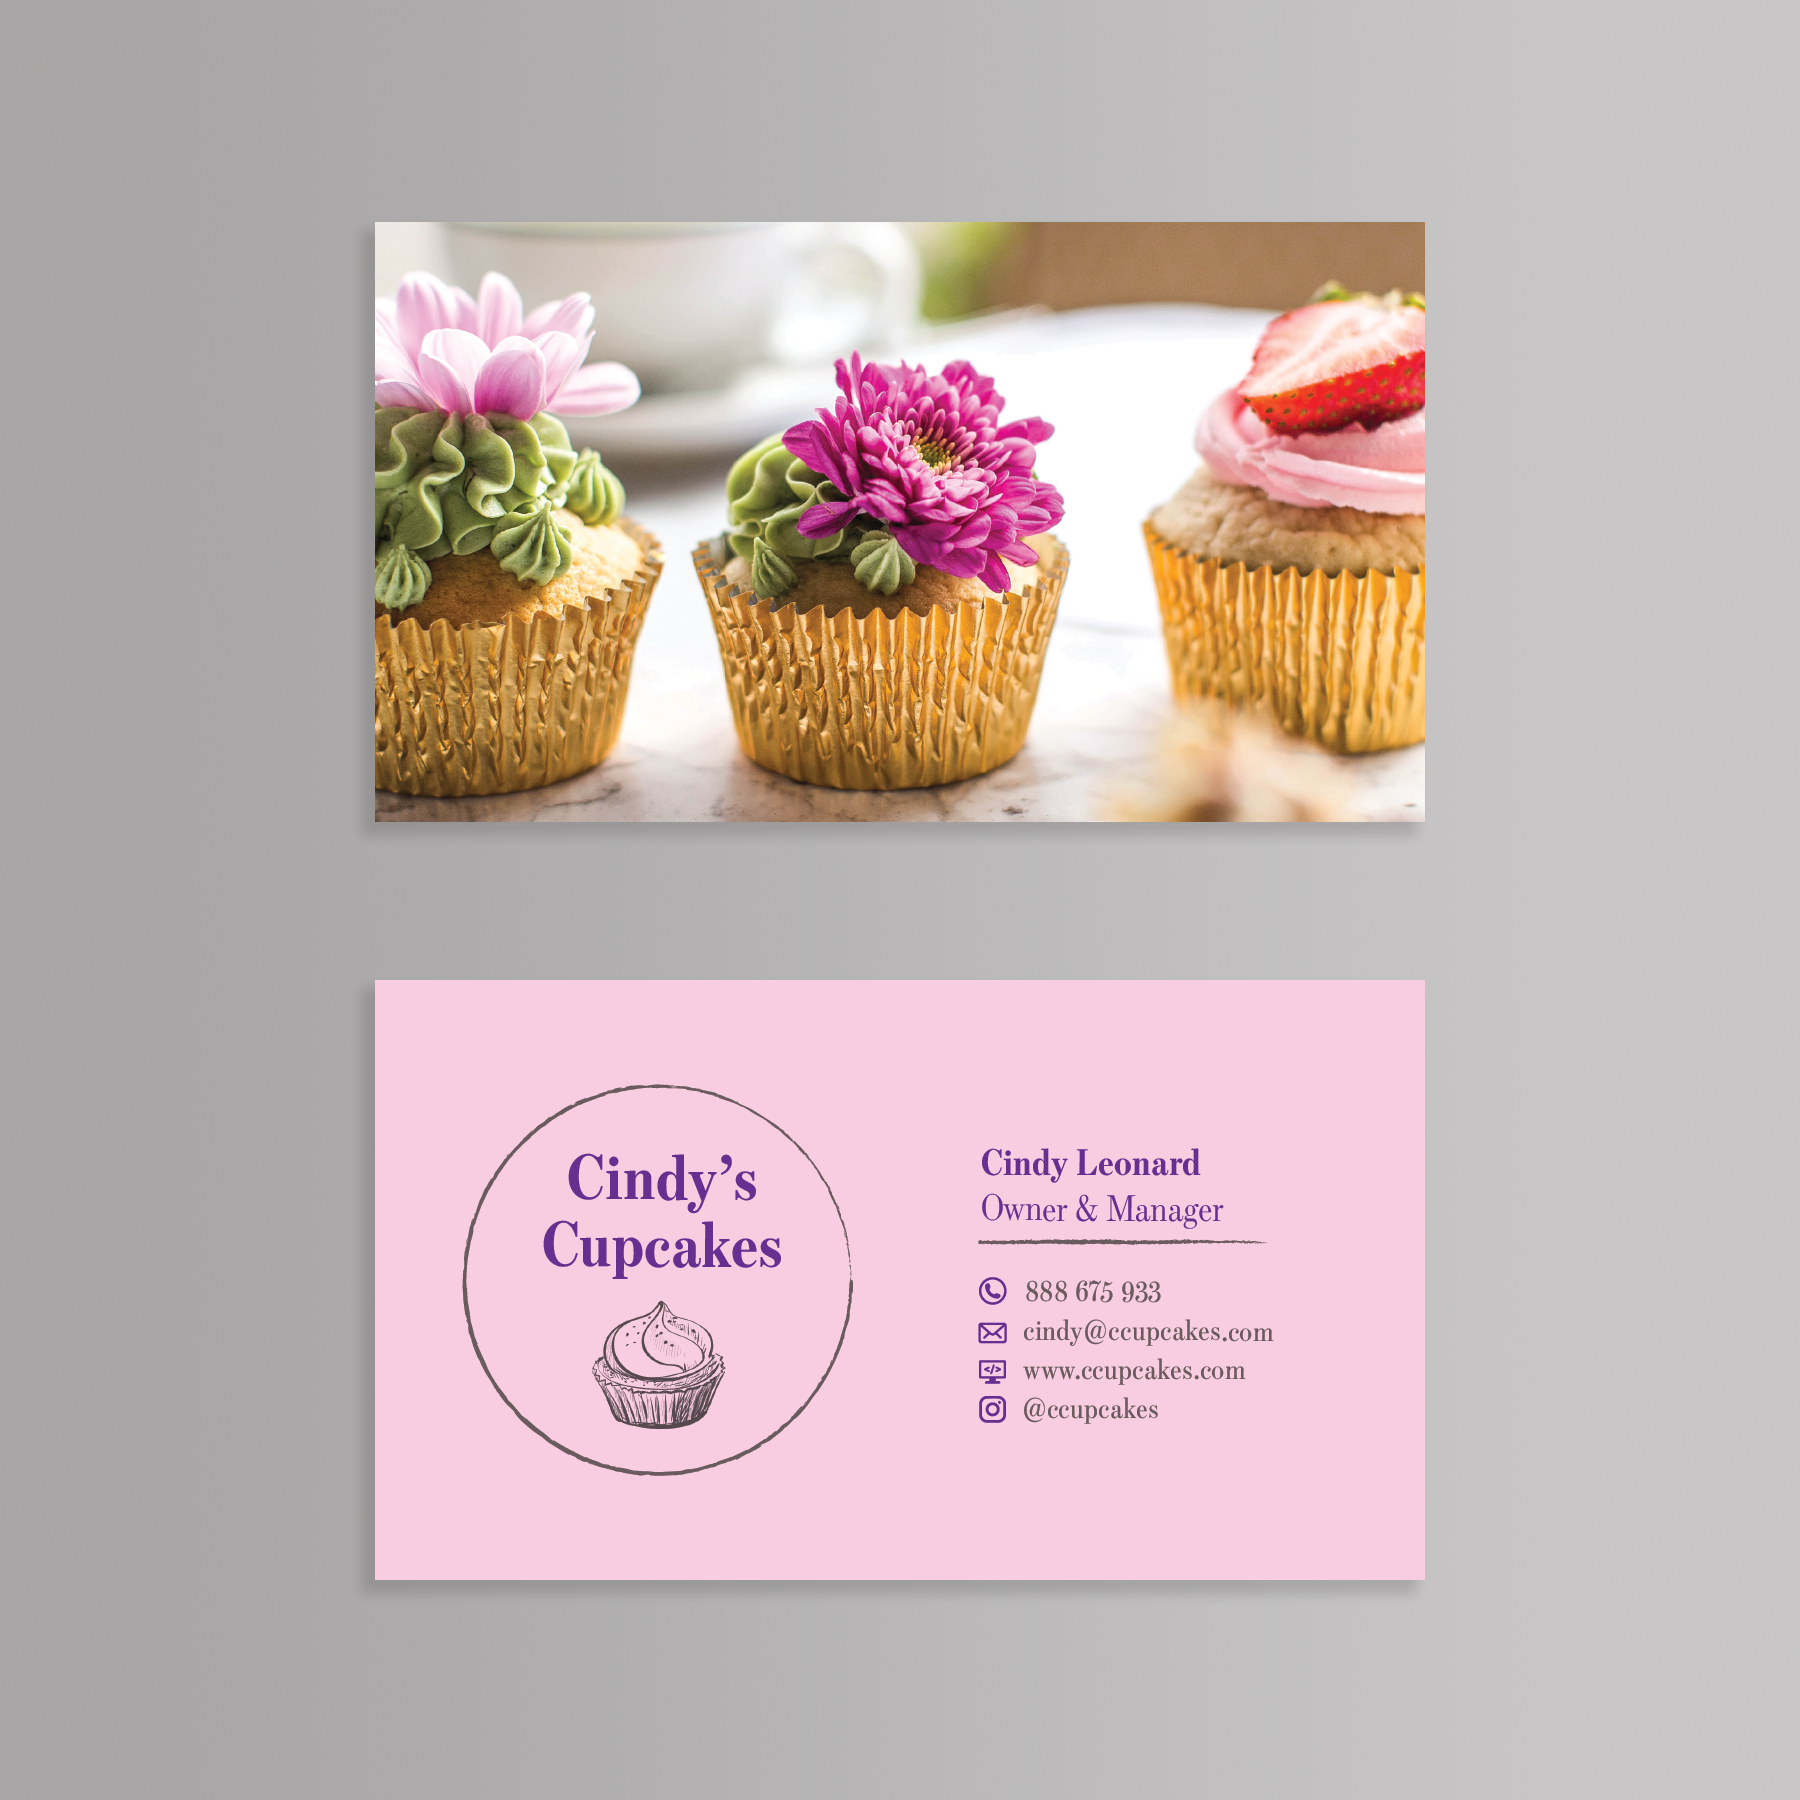
Here are three examples of mockups created with this method:

Before starting
0.1 This mockup will take around 5 – 10 minutes of work to create.
0.2 Make sure you have access to Adobe Photoshop. If you don't, you can sign up for a free trial from Adobe to use Photoshop for 7 days. Here's the link for the Photoshop trial page.
0.3 Make sure you have your business cards exported as one of these file types: .jpg .png .pdf. This lesson assumes that your business cards are sized to the USA standard size 3.5”x2” (3.5 inches wide x 2.0 inches tall), with no bleed (i.e. extra edges that get trimmed by the printing company).
STEP 1: Set up the Photoshop document
1.1 Open Photoshop, and select the option to create a new document for print – which may look different depending on the version of Photoshop you are using.
1.2 Set the canvas size to 6“x6” (6.0 inches wide x 6.0 inches tall). Make sure the unit of measurement is inches. Leave the ‘artboards’ option unchecked.
1.3 Set the ‘resolution’ to 300 pixels/inch. Since this is design will be printed, set the ‘color mode’ to CMYK Color (8-bit).
1.4 Lastly, set the ‘background contents’ to white. Click ‘Create’ to generate your document.
1.5 Now that you have created your document, save it as a Photoshop file (.psd): File ⇨ Save As ⇨ type the file name .psd ⇨ click Save.
STEP 2: Place (import) your business card designs
2.1 Place (i.e. import) your business card front design: File ⇨ Place Embedded ⇨ select your front design ⇨ click Place ⇨ then press Enter. This will place the business card image down onto the center of your Photoshop canvas at its correct scale of 3.5”x2” (3.5 inches wide x 2.0 inches tall). This 6”x6” square Photoshop canvas will also work if you have square, vertical, or other sized designs for your business card, just make sure that they are imported at their correct scale.
2.2 Use the Move Tool (which looks like a four-directional arrow, typically located at the top of the tool bar) to click and drag the front design for your business card into the top half of the Photoshop canvas.
2.3 Using the same method as in the previous two instructions above, place the design for the back of your business card and use the Move Tool to click and drag the back design into the empty bottom half of the Photoshop canvas.
STEP 3: Add a gradient background
3.1 Make sure you can see the Layers panel. To make sure that you can see the Layers panel, look in the menu bar: Window ⇨ Layers ⇨ make sure there is a check mark next to Layers, indicating that the panel is visible. You can drag the Layers panel to wherever you want it on your screen, typically it sits on the right edge.
3.2 Add a new layer by clicking the Create New Layer button (which looks like a new page icon) that is at the bottom of the Layers panel, adjacent to the Delete Selection trash can button.
3.3 The new layer will be automatically named Layer 1. Within the Layers panel, click and drag Layer 1, and drag it down so that it sits below your business card designs, but above the white background layer [refer to Figure 1 below].
3.4 Select the Gradient Tool, by clicking and holding the Paint Bucket Tool button – which will expand to reveal additional tools including the Gradient Tool (which looks like a rectangle filled with grey shading).
3.5 Now you can select two colors for your gradient background. Photoshop allows you to have two colors selected at any time, and these are named the Foreground Color and the Background Color. The Gradient Tool will use these two color selections to create your gradient. By default, the Foreground Color is black and the Background Color is white, which are visible at the bottom of the tool bar. Double click on the black Foreground Color square to open the first Color Picker window. Select a color such as a medium grey and click ‘OK’ to set it as the Foreground Color [refer to Figure 2 below].
3.6 In the same area at the bottom of the tool bar, double click on the white Background Color square to open the second Color Picker window. Select a color such as a light grey, and click ‘OK’ to set it as the Background Color.
3.7 With your entire Photoshop canvas visible in your workspace, and the Gradient Tool still selected, you can now draw a line that tells Photoshop how to display your two-color gradient. Click and drag to draw a directional line across the whole canvas. The Foreground Color will be placed where you click to start the line, and the Background Color will be placed where you release the click to end the line. For example, drawing a line from left to right will make the background transition from medium grey on the left into light grey on the right [refer to Figure 3 below].

Figure 1 (from step 3.3)
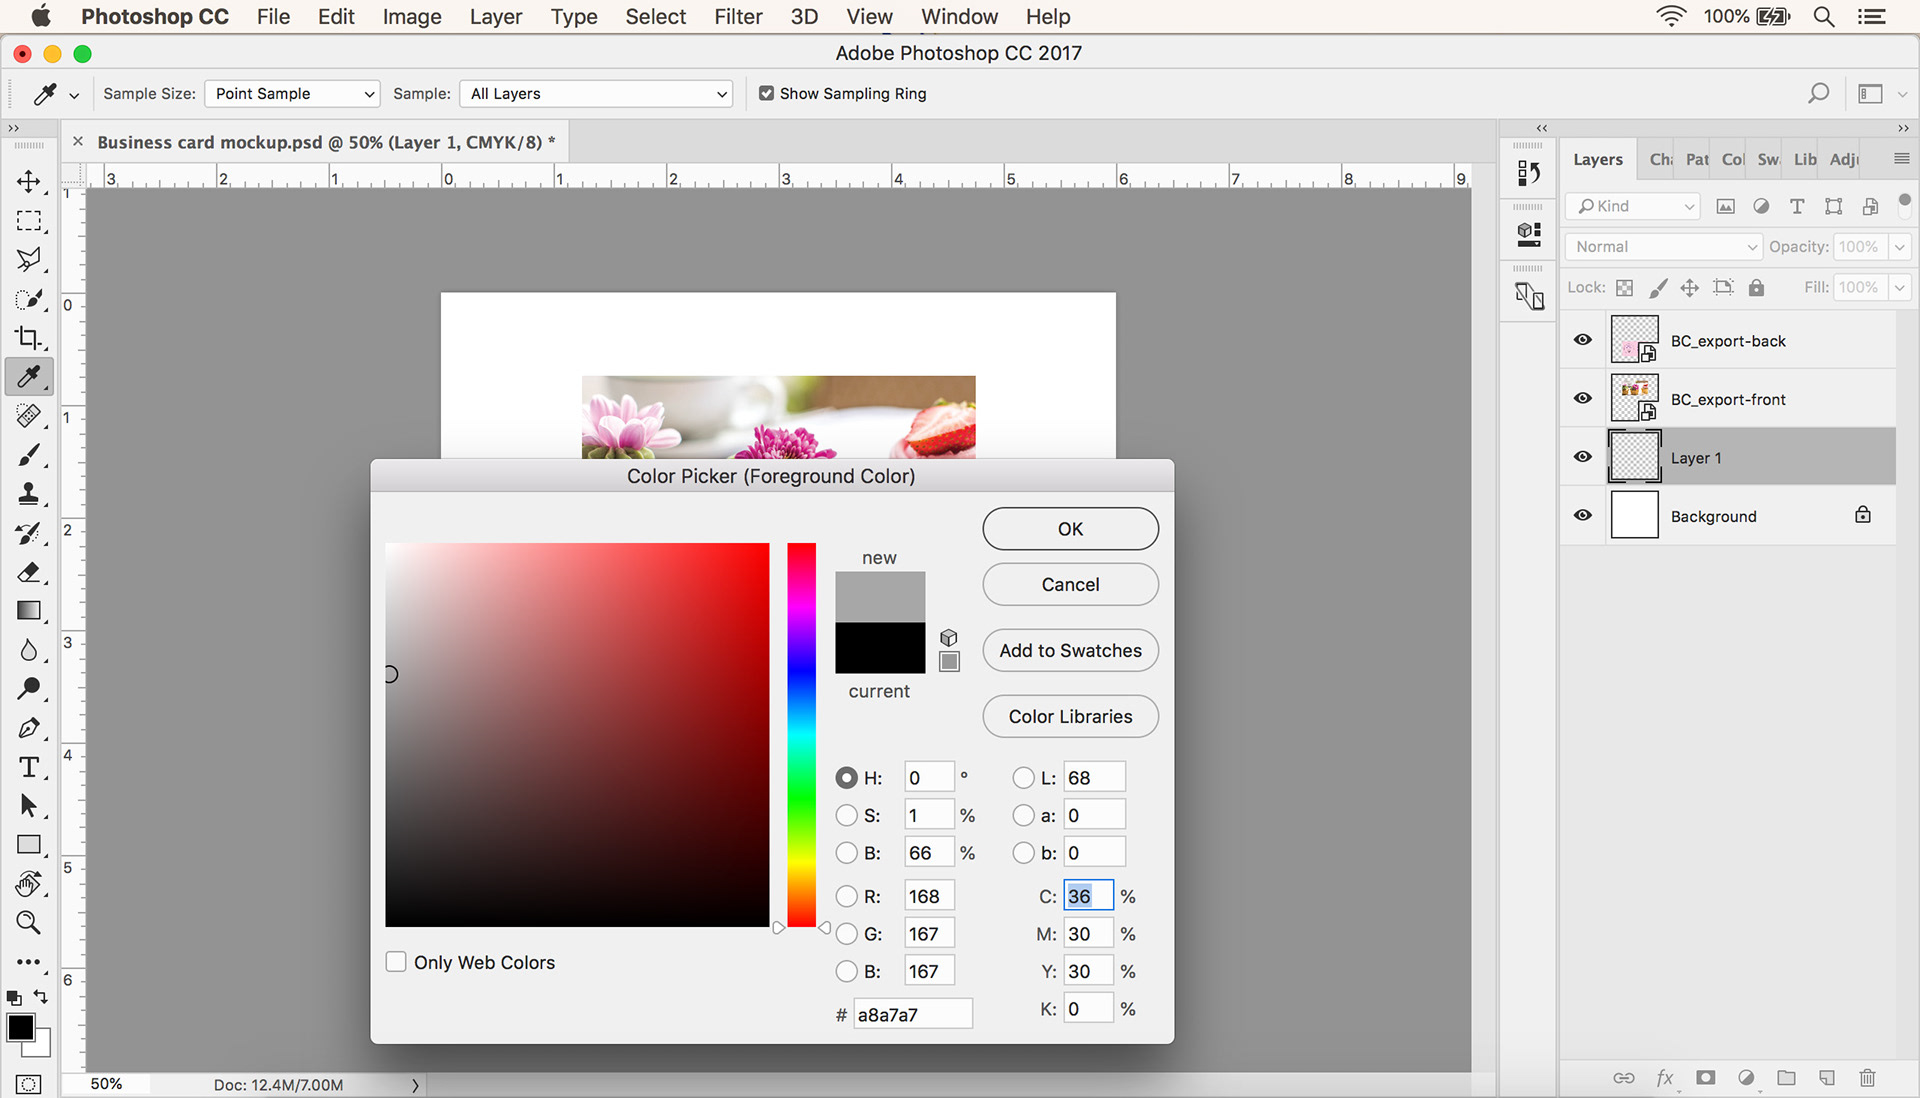
Figure 2 (from step 3.5)
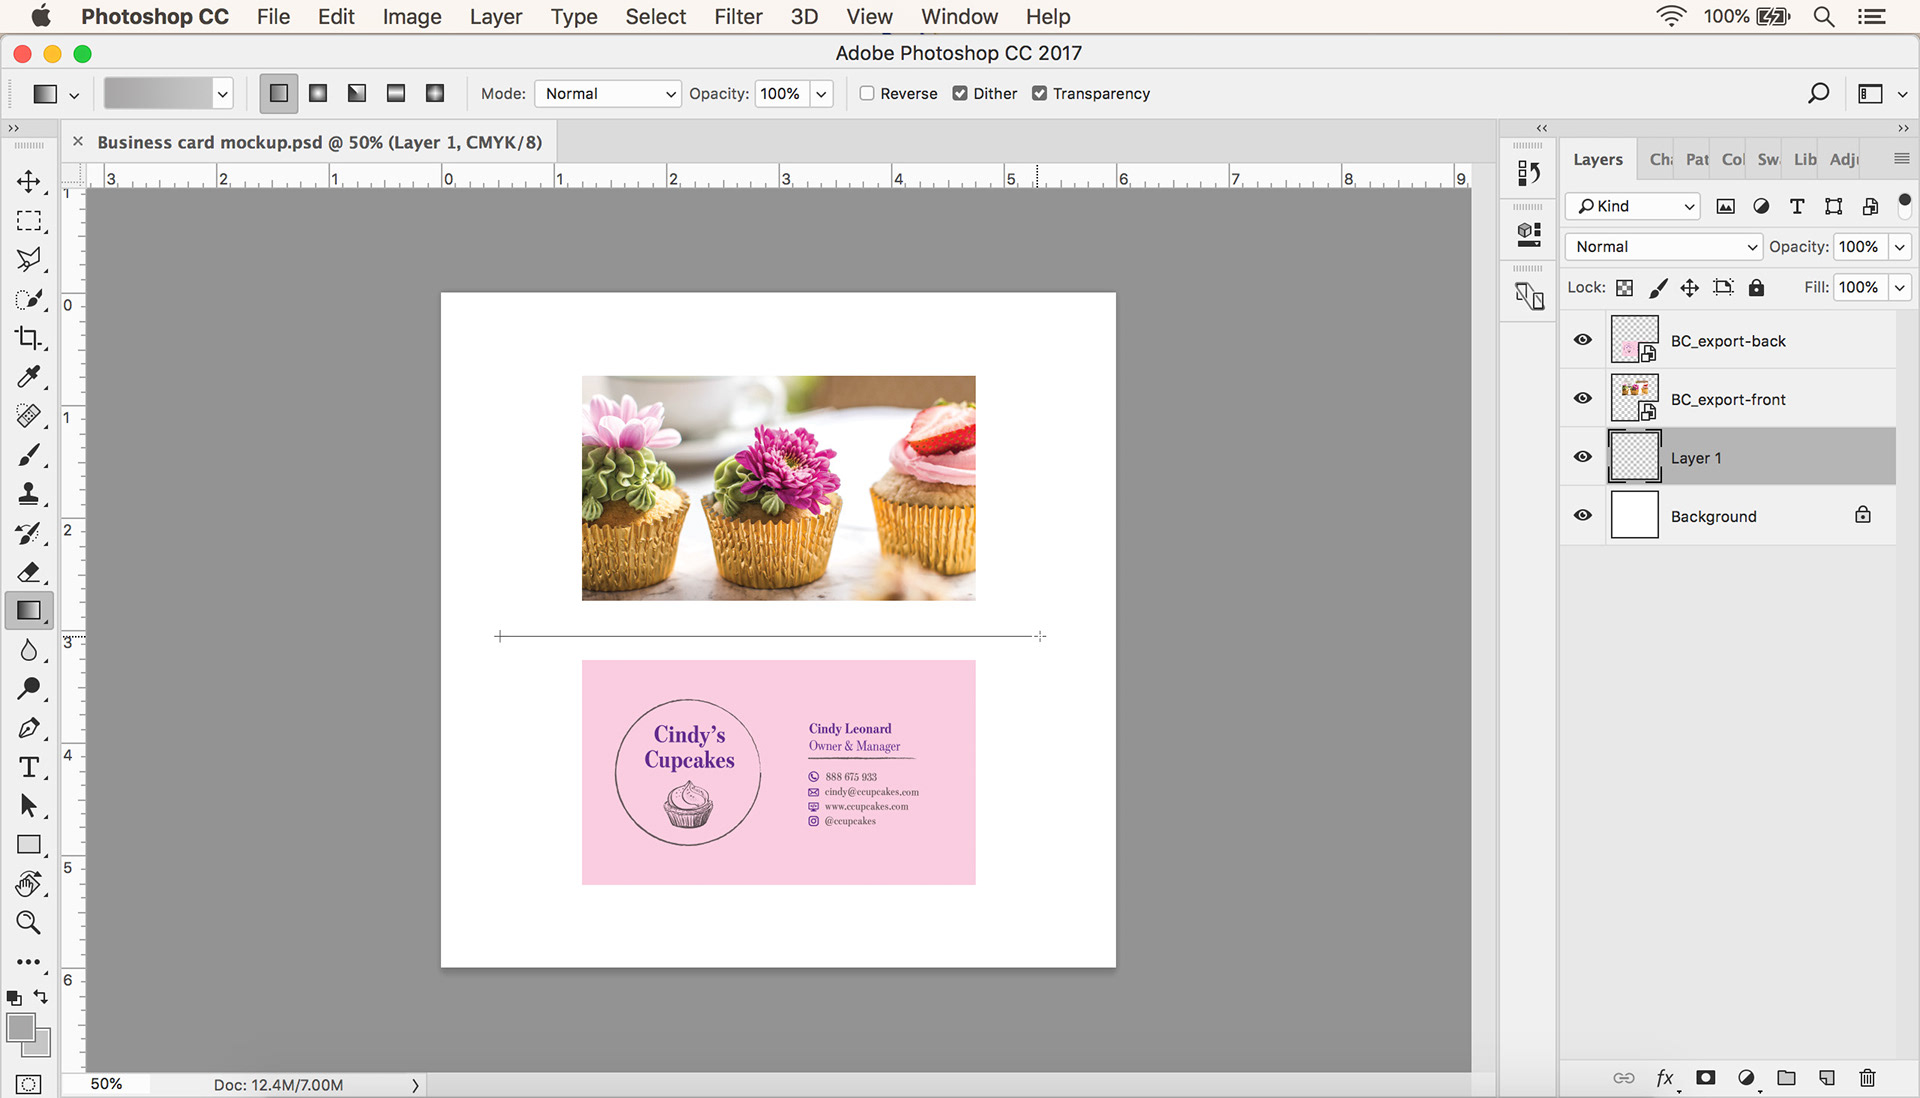
Figure 3 (from step 3.7)
STEP 4: Add drop shadows
4.1 In the Layers panel, double click the layer that contains your business card front design. You must click in the blank area next the the layer name (i.e. not on the layer name text) to open the Layer Style options. These are visual effects that you can add to that layer.
4.2 Click on the text that says Drop Shadow at the bottom left of the Layer Style options. Make sure that the Drop Shadow tab is highlighted in dark grey and that there is a checked box next to the item.
4.3 Set the Drop Shadow ‘Structure’ settings [refer to Figure 4 below]:
Blend Mode = Normal
Color = Black
Opacity = 10%
Angle = 45° (degrees)
Use Global Light = Yes (checked box)
Distance = 15 px (pixels)
Spread = 15 % (percent)
Size = 15 px (pixels)
Blend Mode = Normal
Color = Black
Opacity = 10%
Angle = 45° (degrees)
Use Global Light = Yes (checked box)
Distance = 15 px (pixels)
Spread = 15 % (percent)
Size = 15 px (pixels)
4.4 Leave the Drop Shadow ‘Quality’ settings as the default options [refer again to Figure 4 below].
4.5 Click ‘OK’ to view the drop shadow layer style on your front card design.
4.6 Repeat the whole STEP 4 process for the back card design.
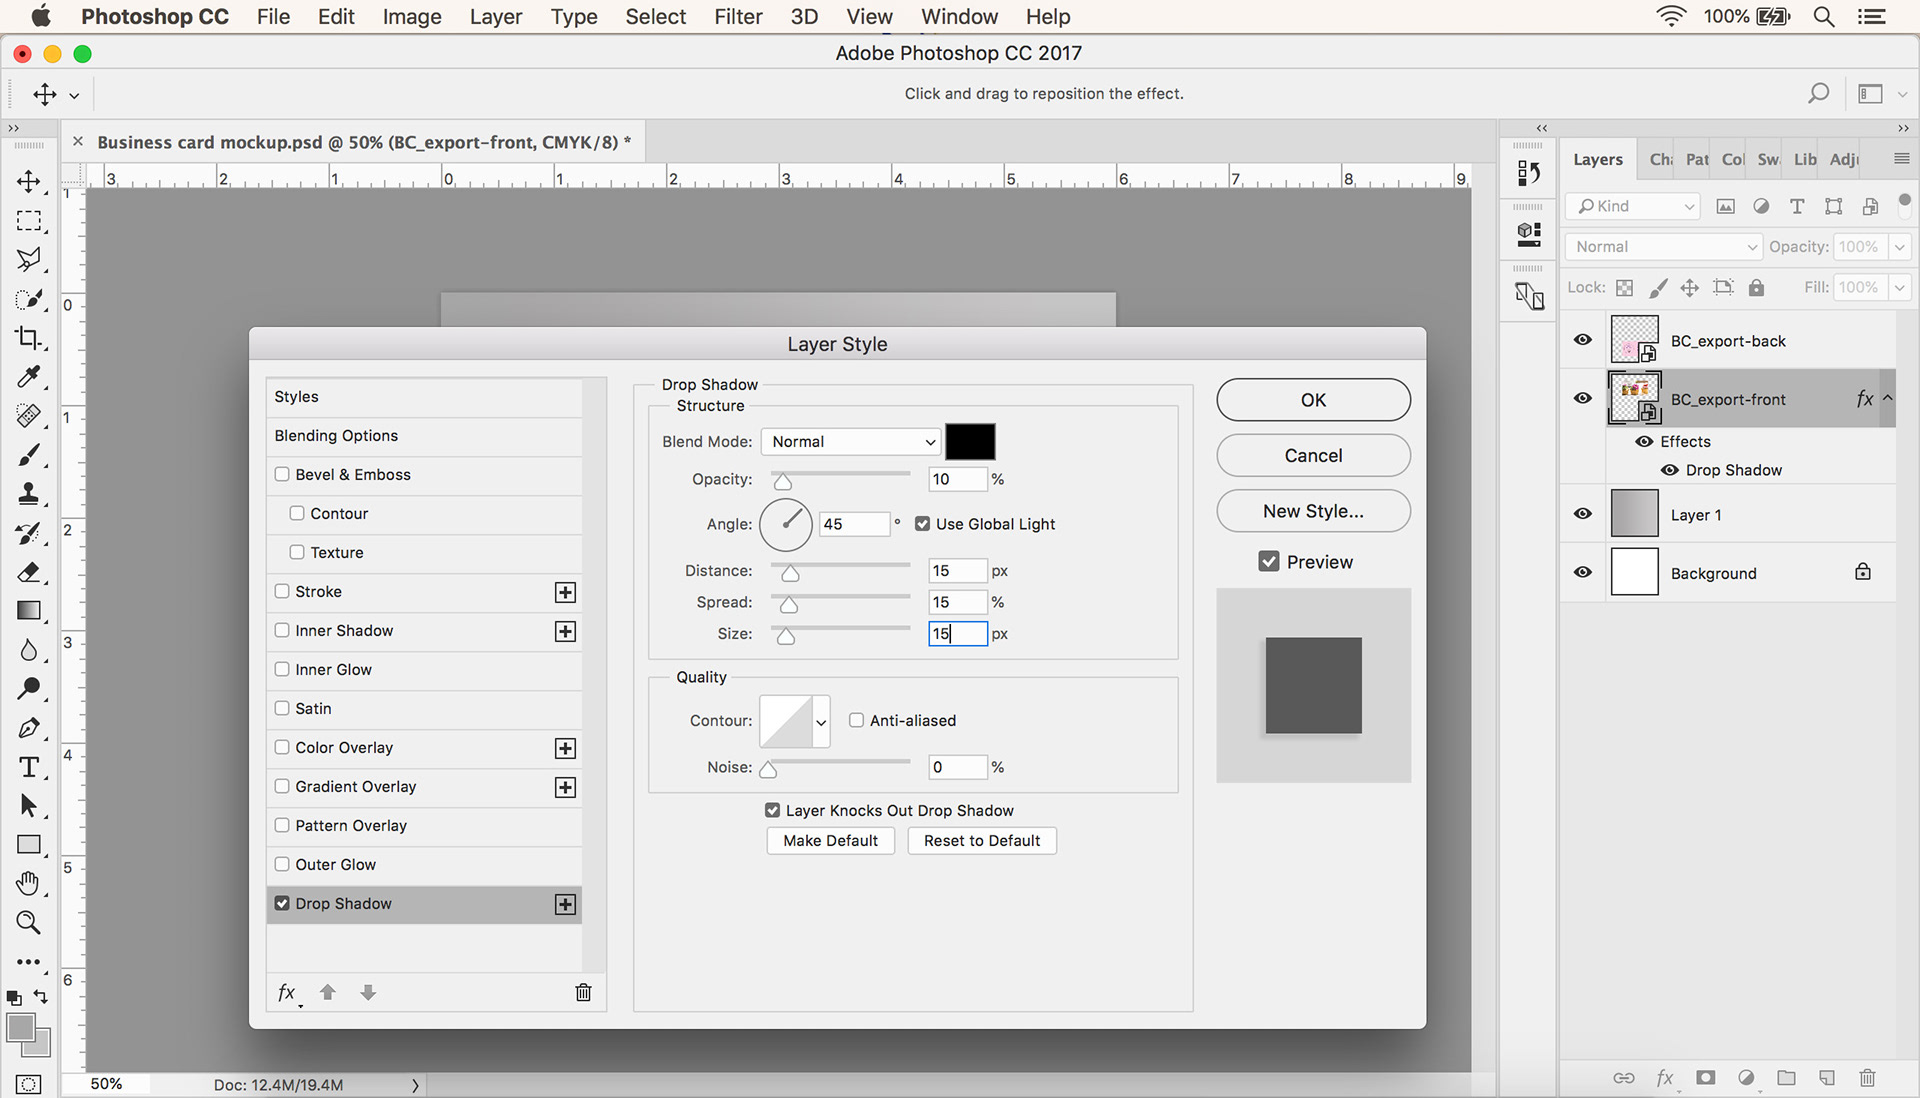
Figure 4 (from steps 4.3 and 4.4)
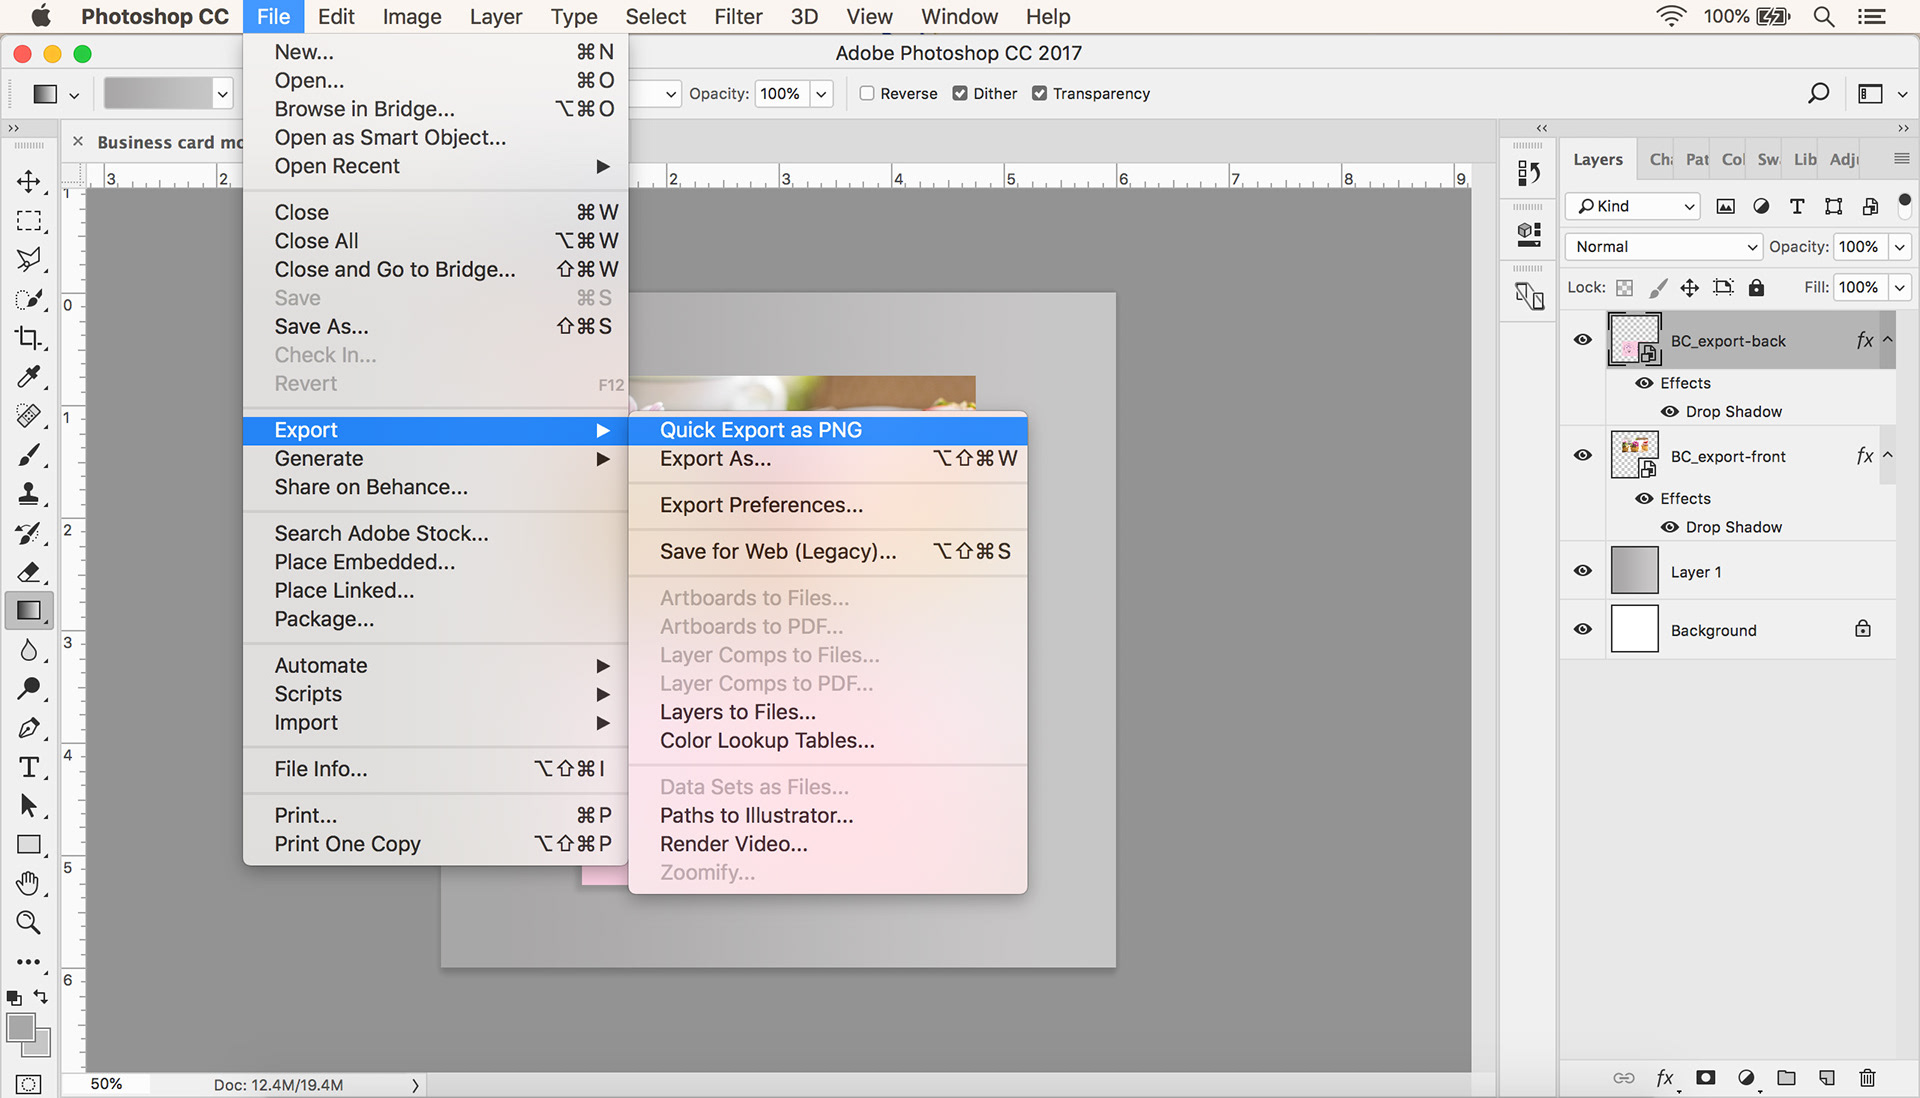
Figure 5 (from step 5.2)

Figure 6 (from step 5.3)
STEP 5: Export the finished business card mockup
5.1 Before you export the finished mockup image, take a moment to save your completed Photoshop file (.psd): File ⇨ Save.
5.2 The easiest way to export your mockup is to save it as a PNG file (.png): File ⇨ Export ⇨ Quick Export as PNG ⇨ type the file name .png ⇨ click Save [refer to Figure 5 above].
5.3 Your finished business card mockup will be saved as a PNG file [refer to Figure 6 above].
How to extend these skills
Using the technique you have just learned, you can create any minimalist or brightly colored gradient by selecting two different colors for your background. Now that you have learned the basics, you can also experiment with different settings for the Gradient Tool and the Drop Shadow layer style, until the mockup looks perfect for your needs.